The Club of Black and White Photography and NOIR the best of The Club of Black and White Photography curators have very kindly bestowed an award for best image of the month of August to one of my images.
The international group is comprised of 68,977 photographer members, so it’s nice to have an image chosen from such a talented and large group of people.
The image was shot as part of my reportage on the COVID 19 lockdown. It was made on my Panasonic Lumix G9 and an Olympus M.Zuiko 75mm f1.8 lens.
My English Countryside Flowers photograph is available as a 50″x40″ stretched canvas print for a promotional price, 35% off, on a limited run of 15, for four days (ends September 10th).
The image was made in West Sussex, England, in a field of wild flowers, as the sun was beginning to set. Shot on a Lumix S1R, with a Lumix S Pro 50mm f1.4 lens.
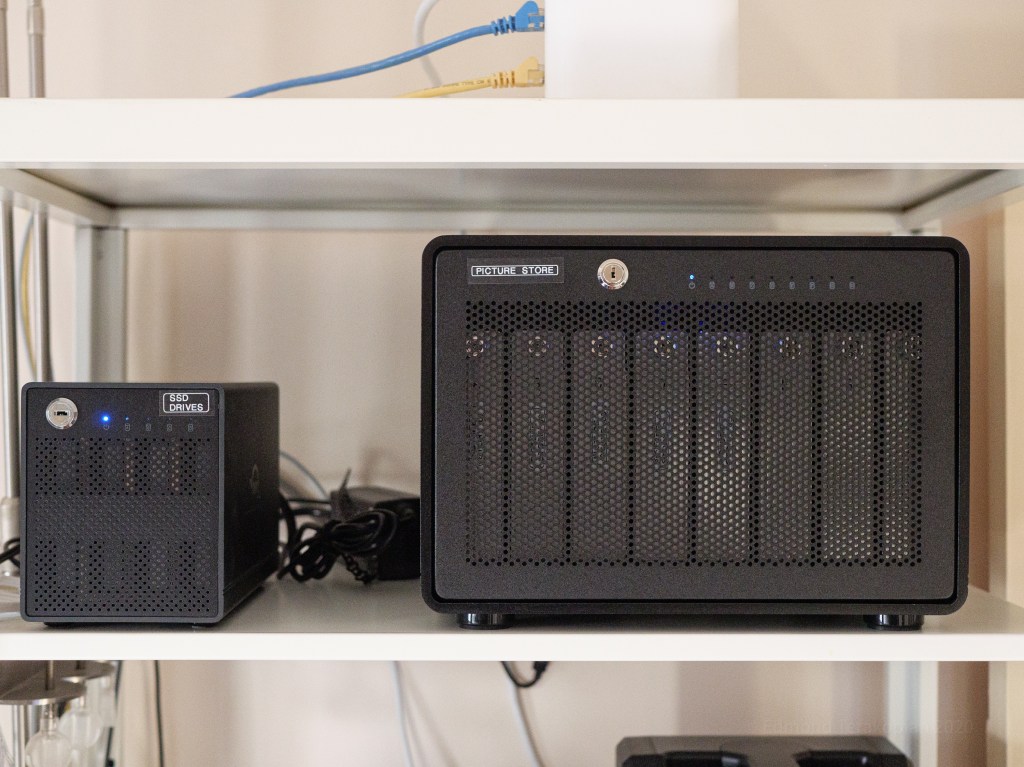
With the constant need for more storage, when my current storage got down to a few hundred gigabytes of free space, the time came to expand. I was very happy to spot that OWC had brought out a new 8-bay solution, which I had somehow missed. So I ordered the OWC ThunderBay 8-Bay Enclosure to expand my photographic and video storage.
I’ve been using various OWC external storage boxes for many years now. My current storage for my picture library (including video) was residing on a four bay ThunderBay box, filled with WD 6Tb Enterprise class hard drives. These were all left as individual drives, connected via Thunderbolt 2 to my Mac Pro. Once the fourth drive was down to a few hundred gigabytes of free space, it was time to plan ahead and upgrade.
Before I continue, a few explanations on why use multiple drive bay enclosure boxes, over getting individual external drives. In a nutshell, its to keep things nice and tidy. Declutter. With a box storing 2, 4 or 8 hard drives, you only need one electricity plug and one connection cable to your computer, not 2, 4 or 8. It also means that my entire picture library is always available; many colleagues have to unplug and plug in various hard drives to try and find more historical work. Lastly, the constantly attached library also means that Cloud backups can happen fully and properly.
The ThunderBay enclosures aren’t hardware RAID boxes, but give you an option of using SoftRAID (a software RAID, available in two versions) by OWC. It’s not something I personally use. All my drives in my ThunderBay enclosures have always been used as individual drives (I do use hardware RAID 5 in other enclosures as backup boxes). These individual hard drives are then backed up to my RAID 5 box using Carbon Copy Cloner, backed up offsite manually (per assignment) and also backed up in the Cloud automatically, using Backblaze. Incidentally, that Backblaze referral link will give us both a free month of Cloud backup, if you’re a new customer.
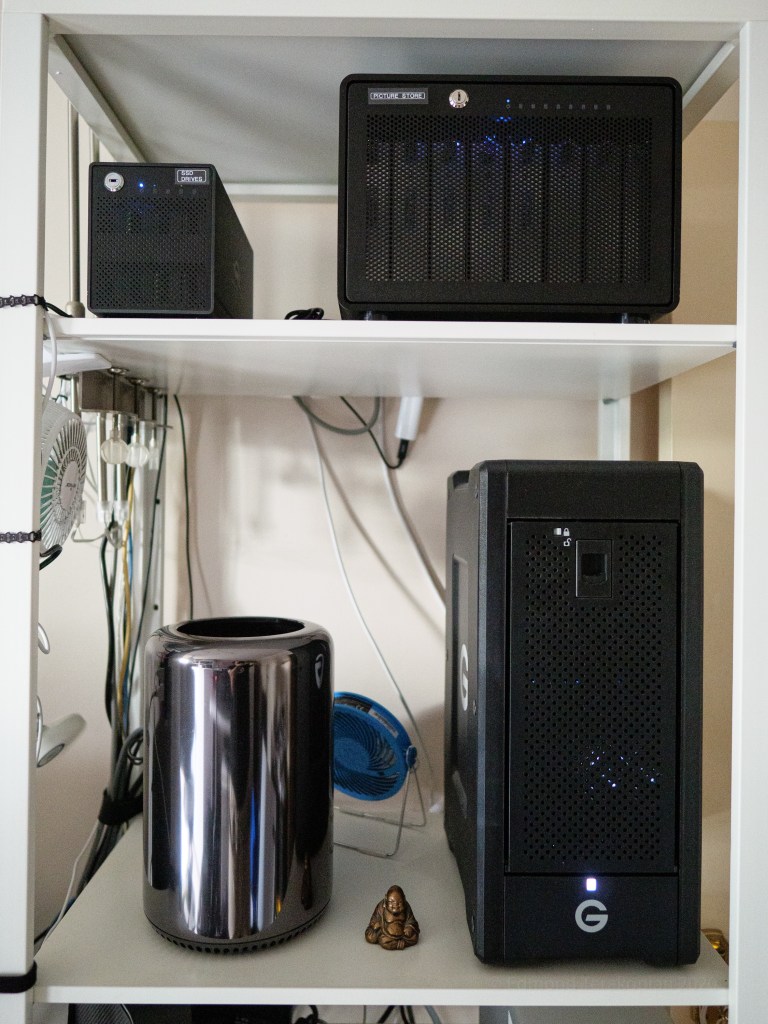
Once the OWC ThunderBay 8-Bay TB3 Enclosure arrived, I simply shut down my Mac Pro, took out the four hard drives from my previous ThunderBay 4-bay enclosure, installed them in the 8-bay enclosure and added the fifth, new drive. Each drive screws into its own drive tray using the supplied screws. After some research, I also decided to try a Toshiba Enterprise class hard drive for the first time. I opted for the Toshiba 8.0TB MG05ACA Series SATA Interface Enterprise Class Hard Disk Drive, also available from OWC. This leaves three bays free in the box, for future upgrade needs. It’s an extremely elegant, practical and future proof solution for one’s never ending storage needs.
Something worth thinking about, if your current storage involves multiple external drives, with a spaghetti like tangle of cables. If you’re not worried about warranties, you are extremely careful and are happy to take the risk (there is always risk present in doing anything with the innards of computers and related equipment) is to physically transfer those individual SATA hard drives into a ThunderBay box. Declutter and become more efficient. The intelligent design also allows 2.5” drives to be used.
However, the best option would be to transfer the data onto new hard drives. I tend to swap out hard disks every 4-5 years, as they all have finite life cycles. Also it means that as hard drives increase in size, the physical number of drives needed is less.
Lastly, always backup your work. You need everything on at least two physically different drives, but ideally three. One set being kept in a geographically different location. Ideally, a final layer of safety would be a Cloud backup.
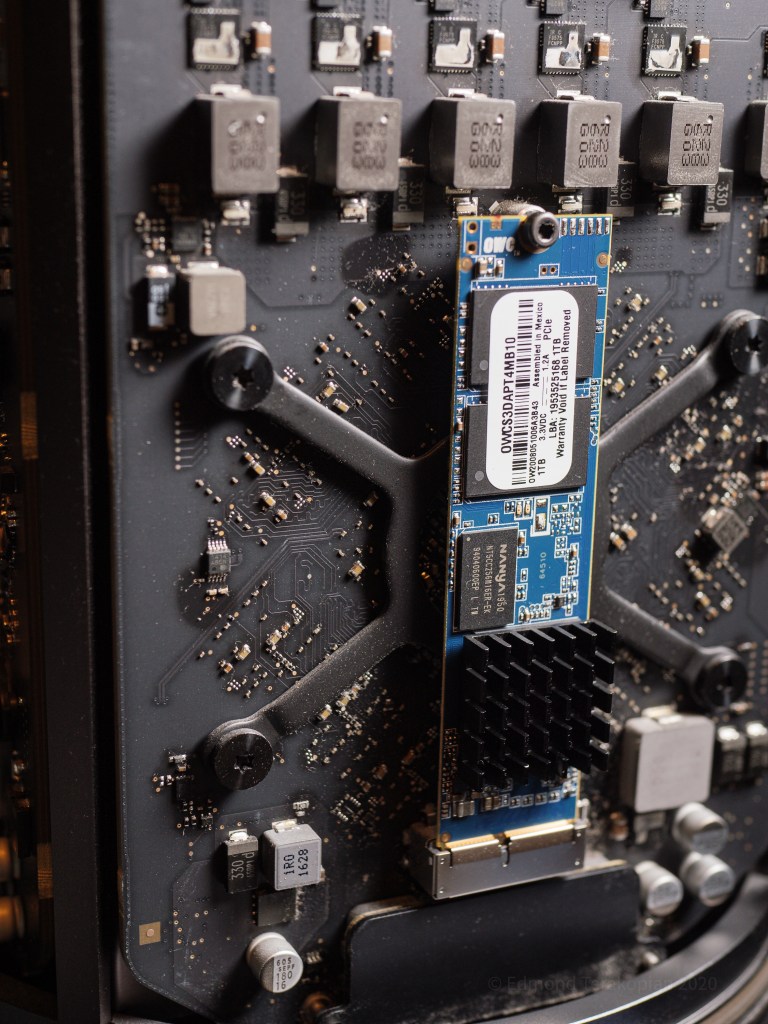
The OWC Aura Pro X2 1.0TB NVMe SSD Upgrade for the Mac Pro 6,1 (Late 2013)
The Mac Pro (Model identifier: MacPro6,1, late 2013) is a frustrating machine in some professional environments. On the one hand, it’s a genius piece of design, with a radically revolutionary cooling system which works wonders, very quietly, in a form factor which is truly unique.
On the other hand though, it’s an extremely limited machine that allows for extremely little internal expansion; something which frustrates many professional users, myself included. Around five years ago though, I had to take the jump and reluctantly got a middle specced machine. My two previous Mac Pro machines had been the affectionately known as the cheese grater chassis. Hugely expandable, with four internal hard drive bays, several expansion slots and dual optical bays that many, including myself, converted to housing SSDs. However with the need for more video and larger raw files, the time came and I got my Mac Pro (3.5GHz 6-core Intel Xeon).
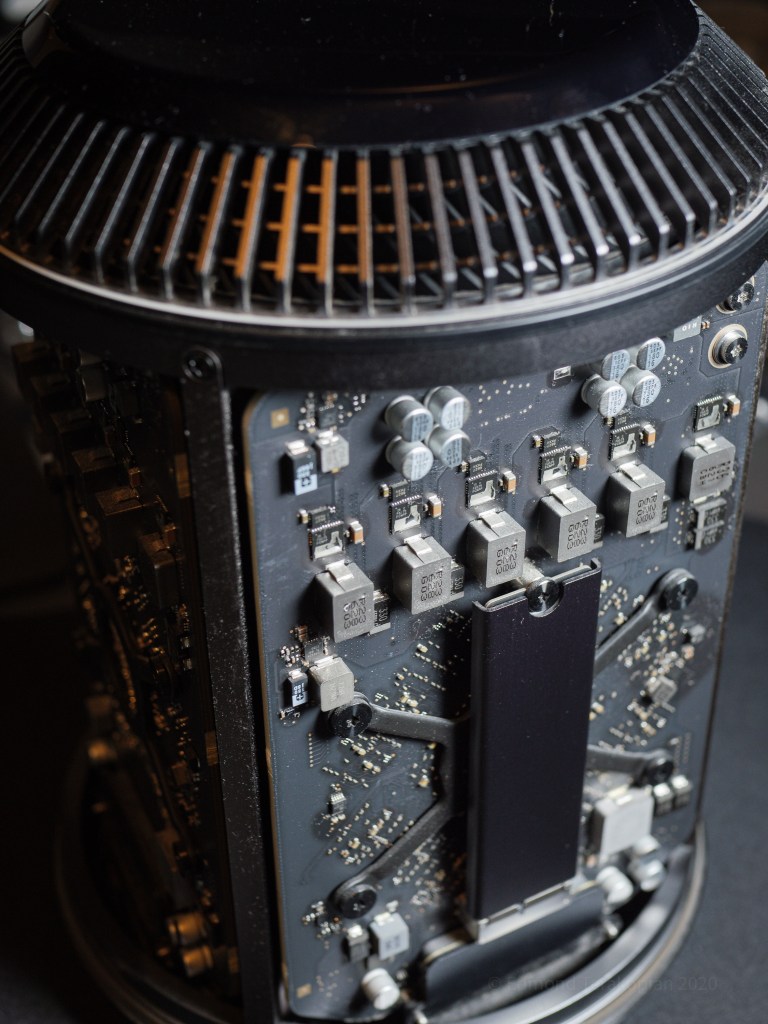
I these expandability terms though, the 2013 Mac Pro though, is extremely limited. One of the big problems is single internal hard drive; in this case, a blisteringly fast NVMe SSD, which is tiny in physical size, and unless you have sizeable funds, is also small in capacity when bought from Apple.
I made do with the built in 256Gb SSD for around 4 years. Moving my Desktop and Document files to my iCloud kept things manageable, but I could only ever have around 22Gb of free space, which would occasionally fill up with cache files (no idea from where, as everything configurable was always assigned to an external SSD attached via Thunderbolt 2 for scratch disk purposes) and constant system messages telling me to clean up my Macintosh HD. Super frustrating, a time waster when on deadline and impossible to do as there was nothing to throw away or configure differently.
I’ve been a huge fan of OWC, having used their various SSDs, RAM and external drive boxes for probably over a decade. In fact, this very machine’s RAM was upgraded as soon as I bought it from the standard 16Gb, using the 64.0GB OWC Memory Upgrade Kit.
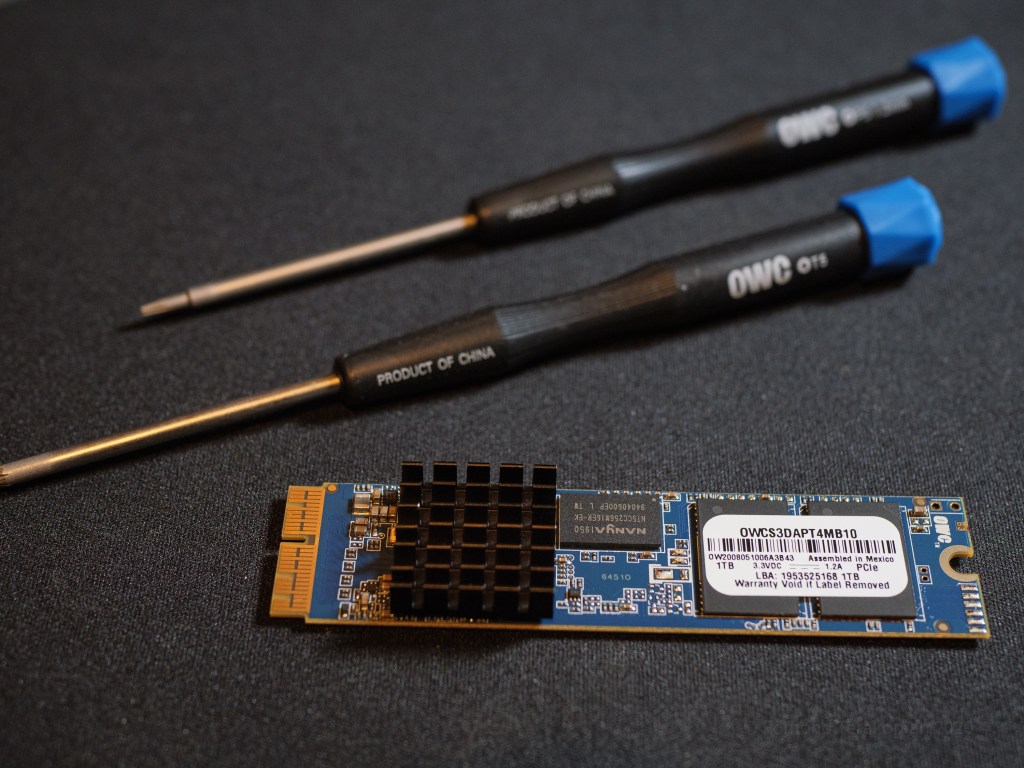
In the end, my frustrations pushed me to looking into upgrading my Mac Pro 6,1’s internal, Macintosh HD, SSD. After a few days of thought, I realised the sweet spot, both for usability and financially, would be opting for the 1Tb size. I also decided to go for the kit, which includes an external case called the Envoy, to house the Apple 256Gb SSD and use as an external drive. So I headed to OWC’s European shop and ordered the Aura Pro X2 SSD for Mac Pro 2013 1TB Kit. The other capacities available are 240Gb, 480Gb and 2.0Tb.
As with everything from OWC, all the specialist tools you need are supplied, along with superb instructions on their website. Upgrading the SSD is very straightforward and most should be able to do it. One crucial thing to check is that you’re running macOS High Sierra 10.13 or later. This is an absolute must, as with High Sierra onwards, the firmware of the Mac Pro 6,1 is updated automatically, which will allow for support of the OWC SSD.
Although I have a Time Machine backup that runs constantly, for extra safety, I formatted a Samsung T5 SSD and made a fresh Time Machine backup onto this (you can have multiple Time Machine drives). I also got another external drive and using Carbon Copy Cloner, cloned my Macintosh HD. Always better to be safe!
As with anything computer related, switch everything off and never touch any part of any circuitry. The static charges that we can build up can fry circuitry, so take your time, be careful and don’t touch anything that’s a circuit or a connector. Once the outer case is remove, you simply unscrew the one retaining screw for the Apple SSD and slide it upwards and out. You need to carefully attach a small heatsink onto the OWC SSD to allow it to cool properly. Whenever attaching a heatsink, its always paramount to make sure you don’t touch the surface of the chip, to ensure it’s clean of any grease or debris. This allows the heatsink to adhere fully and properly, aiding in removing heat to maximum efficiency. Then install the OWC SSD card (firmly yet gently, making sure it’s seated completely in the socket on the motherboard), secure it with the supplied retaining screw, put the outer case back on, lock, attach your cables and you’re almost ready.
I opted to use the Time Machine backup on the Samsung T5 to restore my Mac onto the new OWC SSD. On power up, I held down the Cmd-Opt-R keys until a startup screen appeared. Then formatted the drive using Disk Utilities to APFS. Once done, I chose the Restore From Time Machine Backup option. Chose the Samsung T5 as a Restore Source, then chose the new OWC SSD as the destination, which I had named Macintosh HD in Disk Utility on the previous step and clicked on Restore. There are full instructions for formatting the OWC Auro Pro X2 SSD and the various ways of installing or restoring your data on the OWC website. With every step, you have a helping hand. Just make sure you make a couple of backups as I did, as a safety and peace of mind measure.
I went off to get some dinner, but I think in under an hour the “new” Mac was up and running. As always after a restore, you may need to log back into a few things, but apart from this, everything was running smoothly and perfectly.
I’ve been using my Mac Pro with my new 1Tb OWC Auro Pro X2 SSD for thee days now. I haven’t switched off the machine and it’s been purring along, speedily and without any errors or space issues. With the mightily impressive new Mac Pro (2019 model, MacPro7,1) being so ridiculously expensive and priced well out of the single creative professional’s budget, many of us will be looking at upgrading our current machines to get more out of them. Apple Macs have in my decades of experience, shown that they work well for many years; much longer than one would expect a computer to work. However with more demands from us with bigger raw files, heavier bit rates and ever larger video pixel sizes, our machines need the occasional boost.
Even with the upgradeably challenged form factor of the affectionately called Dustbin Mac Pro, changing simple things like the SSD and upgrading the RAM to 64Gb (128Gb is possible, but from my research for most workflows won’t bring much if any improvements over 64Gb – your needs may vary though, so do your research), can bring a new lease of life and usability. Plus, it comes with a five year warranty. Its a no-brainer!
Very pleased to share a selection of my work is available through my gallery pages on Fine Art America. These images are available primarily as prints, but also as a selection of tasteful gifts and products for the home. I hope you can have a browse and support artists such as myself and some of the very talented colleagues also represented.
As always, bespoke, collector’s grade prints, signed, embossed and with a certificate of authenticity are available directly from me, from my archive. For these, kindly get in touch directly with your needs.
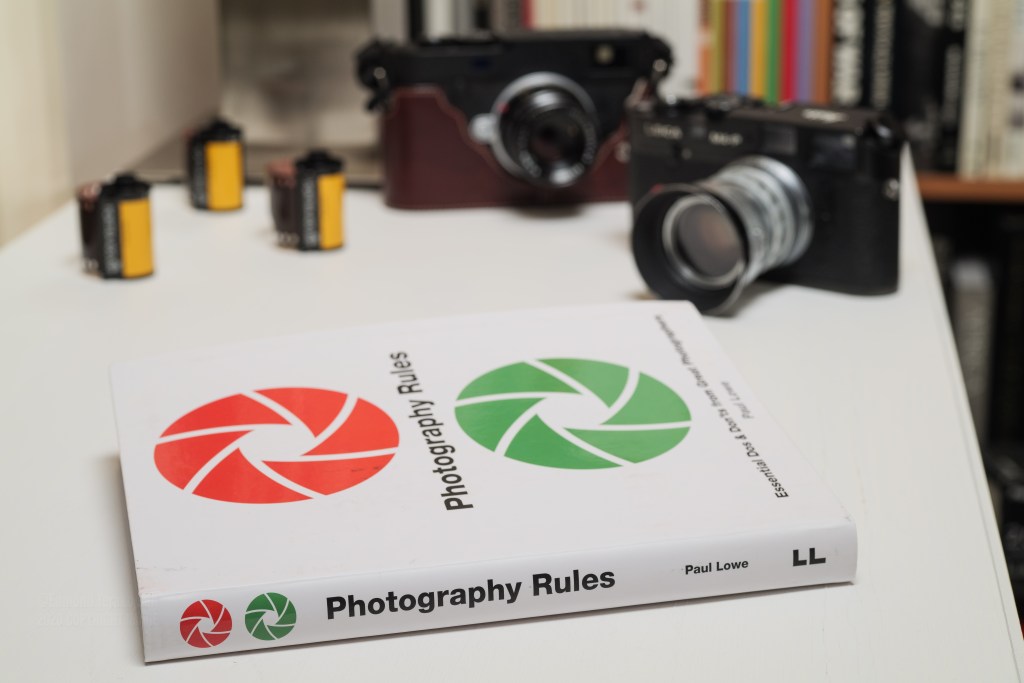
Photography Rules, Essential Dos and Don’ts from Great Photographers is a new book by Dr Paul Lowe. To say that I’m delighted to be part of this amazing book would be putting it extremely mildly! I’m humbled to be in such great company and touched by Paul’s kind invitation to be part of this wonderful project. Sharing pages with one’s own inspirations and heroes in photography is quite literally, awesome.
Photography Rules; Essential Dos and Don’ts from Great Photographers. A book on photography by Paul Lowe, featuring the work and advice by 177 photographers, including Ansel Adams, Richard Avedon, Diane Arbus, Brassaï, Eve Arnold, Elliott Erwitt, Annie Leibovitz, David Hockney, Don McCullin, Nadar, Irving Penn, Chris Steele-Perkins, Sebastião Salgado, W. Eugene Smith, Garry Winogrand and Edmond Terakopian. London, UK. August 05, 2020. Photo: Edmond Terakopian
As photographers, we all consciously or more often, sub-counciously form our own philosophies and rules. Be these ethical, compositional, a work ethic or technical. Ways of approaching life, interacting with people, the technical aspects of photography or camera techniques that serve us well.
This fascinating insight from some of the most amazing photographers, stretching back to greats like Ansel Adams or Richard Avedon, Brassai to Bresson, is not only interesting but thought provoking, enlightening and inspirational.
As Paul Lowe writes, “The book is not a systematic ‘how to’ guide to photography but it does have a reasonably logical progression of entries, organised into three main categories of rules: ‘Making Photographs’, ‘Being a Photographer’ and ‘Professional Practice’. These follow the journey of the photographic process from even before the image is made through to building a long- term corpus of work to its distribution to the world. Individual genres and approaches to photography are interspersed throughout, covering fields such as portraiture, documentary and photojournalism, landscape and commercial photography.”
This book is going to appeal to an extremely wide range of photographers; seasoned professionals to those who are at the start of their journey in photography. Not only do I see this as becoming essential reading for every student in photography, but also for photography enthusiasts and amateur photographers who want to get an insight into the thought process of the authors behind some of the images they admire.
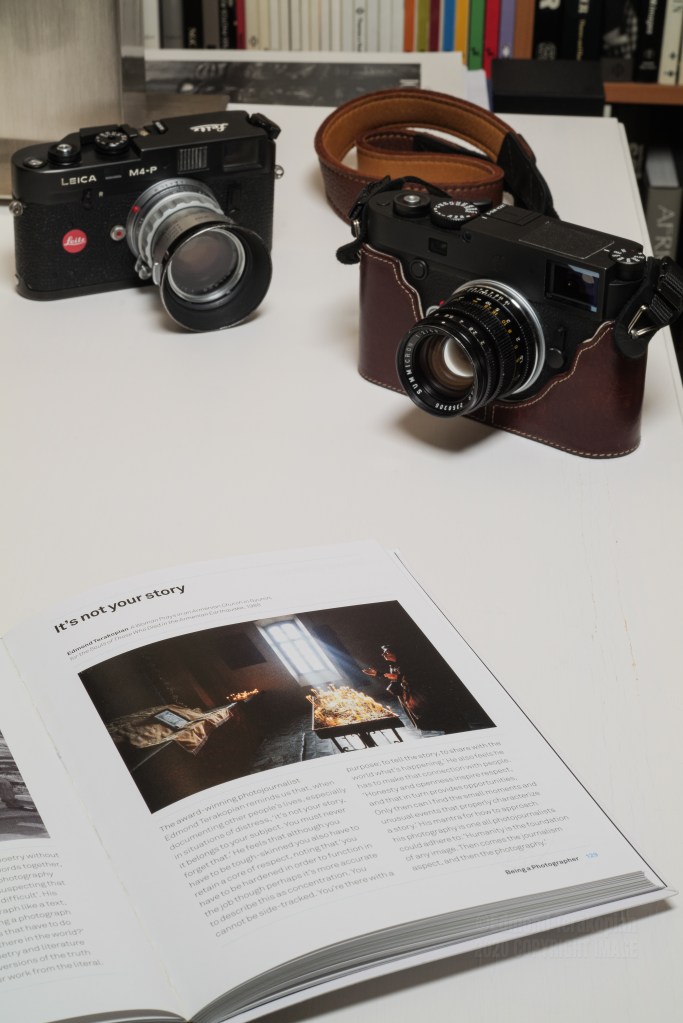
My own contribution, is about my personal approach to photojournalism, the ethics I live by and is listed in the ‘Being a Photographer’ section of the book. The beginning of the text reads, “The award-winning photojournalist Edmond Terakopian reminds us that, when documenting other people’s lives, especially in situations of distress, ‘it’s not your story, it belongs to your subject. You must never forget that.’”
Photography Rules; Essential Dos and Don’ts from Great Photographers. A book on photography by Paul Lowe, featuring the work and advice by 177 photographers, including Ansel Adams, Richard Avedon, Diane Arbus, Brassaï, Eve Arnold, Elliott Erwitt, Annie Leibovitz, David Hockney, Don McCullin, Nadar, Irving Penn, Chris Steele-Perkins, Sebastião Salgado, W. Eugene Smith, Garry Winogrand and Edmond Terakopian. London, UK. August 05, 2020. Photo: Edmond Terakopian
It accompanies my photograph documenting life, 10 years on from the devastating earthquake that struck Armenia. “A Woman Prays in an Armenian Church in Gyumri, for the Souls of Those Who Died in the Armenian Earthquake, 1988.”
Edmond Terakopian. London, UK.
The photograph from Gyumri was shot on a Leica M6 with a Leica 35mm Summicron, using Kodak Ektachrome slide film.
Photography Rules, Essential Dos and Don’ts from Great Photographers is out now and alongside good bookshops, is also available online from Amazon.
Biography: Dr. Paul Lowe is a Reader in Documentary Photography and the Course Leader of the Masters programme in Photojournalism and Documentary Photography at the London College of Communication, University of the Arts, London, UK. Paul is an award-winning photographer, whose work is represented by VII Photos, and who has been published in Time, Newsweek, Life, The Sunday Times Magazine, The Observer and The Independent amongst others. He has covered breaking news the world over, including the fall of the Berlin Wall, Nelson Mandela’s release, famine in Africa, the conflict in the former Yugoslavia and the destruction of Grozny.
I do not condone nor can I be held responsible for reader comments published on this blog; they are the sole responsibility of the reader making the comment.