My day with one of the most exclusive digital cameras ever made
World Exclusive

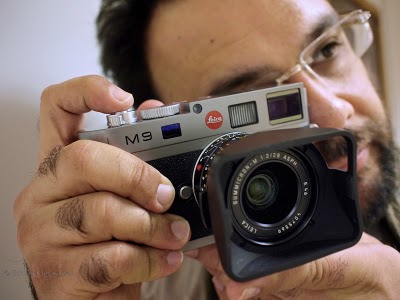
Photographer Edmond Terakopian tests the limited edition Leica M9 Titanium. November 12, 2010. Photo By Brett
There were rumours abound before Photokina 2010 about Leica bringing out a new camera; talk of an M9.2, a different digital M and even a digital body that would take the Leica R lenses. Well, the different digital M turned out to be right, but who would have thought it would be anything like the Leica M9 Titanium, or Titan as it’s also called?

The limited edition Leica M9 Titanium, complete with Summilux-M 35mm f1.4 ASPH in Titanium. November 12, 2010. Photo: Edmond Terakopian
I must admit to not being a big fan of the limited editions that companies produce; I’m a photographer and want tools which are reliable and produce the utmost in imaging quality. I’ve often sighed to myself when I’ve seen limited editions of the M6 or M8. My thoughts at the time were always the wish that Leica would stop concentrating on these and put all their energy into making a ‘proper’ digital rangefinder. For me, the M8 and M8.2 just didn’t cut it. Well, the M9 certainly does cut it and ever since reviewing it for the BJP at launch, I’ve been saving for my own M9 which I recently bought. Leica has changed a lot in recent years; fresh thinking has brought amazing products like the S2 and some stunning M optics as well as the wonderful M9. So, considering the current lineup, I didn’t sigh when I first saw pictures from the launch, but was rather intrigued.
The M9 Titanium though is an absolute departure from putting exclusive leathers and other materials onto the normal camera’s outer casings. Although it has an M9 at it’s heart, it has a completely a new casing, even down to the base plate. There is also some new technology in the viewfinder, more of which later. As it’s name suggests, the material is Titanium; tough and light – pretty much ideal for a camera. Every piece of exterior metal is made from solid Titanium and the body is covered in beautiful high grade leather.

The limited edition Leica M9 Titanium, complete with Summilux-M 35mm f1.4 ASPH in Titanium. November 12, 2010. Photo: Edmond Terakopian
So, what to do about designing the camera? Well, the answer surprisingly was to approach a car designer; to quote Leica:
“The exclusive special edition Leica M9 “Titanium” is the result of a collaboration with Walter de’Silva, the prominent automobile designer. Responsible for groundbreaking design concepts for the latest models from the Volkswagen Group, the chief designer and his Audi Design Team have re-interpreted the design of the LEICA M9 just as he envisaged it. The outcome is a unique camera with a new interpretation of the characteristic features of Leica rangefinder cameras, which lends precision engineering, unique style and solid titanium to extraordinary formal design.”
It may seem a strange thing to do as cars and cameras are so extremely different, but seeing the camera, I must say that the collaboration is an absolute success. In the pictures first released, the camera and lens looked good, but in real life, it looks and feels superb.
In the days of film, I used to have a Leica 35mm f1.4 Titanium lens – I must say I always loved the way it felt. Well, this camera takes that feeling and multiplies it many times over. I can’t think of anything that can make an M9 feel cheap, but the M9 Titanium does just that! As much as I admire the look and the feel of the camera, I also absolutely adore the lens. The ‘kit’ lens is Leica’s extraordinary Summilux-M 35mm f1.4 ASPH. This too is created using solid Titanium and also comes with a beautifully crafted Titanium lens hood, specifically made for the camera. Even the red Leica badge is custom made from resin and hand-engraved with enamel for the camera. There is also an interesting leather holster for the camera, which again was specifically designed and made for the camera. All of this is packaged up in the most beautiful of presentation boxes, including a gorgeously printed book showing the journey of the camera’s design, from concept to reality.

The limited edition Leica M9 Titanium. Summilux-M 35mm f1.4 ASPH in Titanium. November 12, 2010. Photo: Edmond Terakopian
The good news for the collector is that there are only 500 of these to be made. As I mentioned earlier, this isn’t one of the ‘normal’ limited editions, but a completely new design of camera, in solid Titanium. Price of such exclusivity is £19,800.00. I’m not really a collector, so don’t know much about such things when looked at as investment, but to me, a completely unique camera does make investment sense. Now, if only I could win the Lottery!
In Use
Thanks to the wonderful folks at Leica UK and the Leica Store Mayfair, I was able to spend a day with the M9 Titanium. Naturally all the testing was done in the office; even if Leica would allow it, I wouldn’t feel comfortable taking such an exclusive and irreplaceable camera out on the street. I need to add though that this camera isn’t part of the 500 but a pre-production proof of concept model; after all, the Leica Stores need to have cameras to show collectors before orders are placed. The one I used had the serial number 6.

Photographer Edmond Terakopian tests the limited edition Leica M9 Titanium. November 12, 2010. Photo By Brett
In the hand, this camera really feels great. The weight and feel of the materials is just perfect. Aesthetically, I think, it works really beautifully, but the feel of the thing is also spot on. Every part of the body, and that gorgeous lens just work. It’s form, function and material in perfect harmony.

Test images shot with a Leica M9 Titanium. Photographer Brett from the Leica Akademie. November 12, 2010. Photo: Edmond Terakopian
One of the first things I wanted to see were the new LED illumintaed frame lines in the viewfinder. Traditionally, these are bright-line overlays. In use, these have served me well for a decade; however, in very bright conditions where the subject has a very light coloured background, they can disappear. The M9 Titanium has a completely new system where LEDs are used for illuminating red frame lines. These are much easier to see; very crisp and accurate. It took a few minutes to get used to, but I think I would welcome this system in future M cameras. Aesthetically this removes the need for an illumination window on the front of the camera, adding to a cleaner look.

The limited edition Leica M9 Titanium. LED bright line frame lines. Unfortunately I couldn't photograph it showing the entire frame, so this image shows the bottom right hand corner. November 12, 2010. Photo: Edmond Terakopian
One thing which did surprise me was that the frame lines still showed the lens pairings as they have traditionally done, e.g. 28mm and 90mm. I was expecting that the system would show just one set of frames for the mounted lens. I guess though that this would need to read the 6-bit coding to differentiate between the lens pair. Perhaps in the evolution of the M line we shall see this function.
Looking at the outside, one thing which is absent is the manual frame-line selector lever. There are some die-hards on certain forums which mourn it’s loss, but I for one have never found a need for it. I already know the field of view a 50mm is going to give me compared to say a 28mm; the need for changing this manually before choosing lenses is, I think redundant. The M9 Titanium looks so much better and cleaner for not having it.
The Summilux-M 35mm f1.4 ASPH is a superb lens; the results just sing. To have it made from Titanium just makes it feel even better in the hand. It’s an absolute joy operating this camera, looking through that superb viewfinder and focusing this gem of a lens; it just feels absolutely spot on.

Test images shot with a Leica M9 Titanium. November 12, 2010. Photo: Edmond Terakopian
Apart from the material and design differences, it just handles like an M9; it just feels even better in the hand. I walked around the office taking portraits of some of the folks there and also some shots of the studio and other shots through an open window. I must admit that it’s the first time in my 21 years as a photographer that I’ve felt privileged using a particular camera; it was a real treat.
The Carrying and Holding Concept

The limited edition Leica M9 Titanium. November 12, 2010. Photo: Edmond Terakopian The limited edition Leica M9 Titanium. The carrying system comprising of the leather holster and the finger loops. November 12, 2010. Photo: Edmond Terakopian
I think one of the obvious things is that this camera will probably never really be used as a photographic tool, but more of a collector’s piece. As a result, I’m looking at these ideas as concepts and not as real world suggestions for working with the camera. As concepts, they are very interesting. The holster is a new approach and is made beautifully out of very high grade leather. I for one would never use it in real life situations though.

The limited edition Leica M9 Titanium, complete with Summilux-M 35mm f1.4 ASPH in Titanium. The finger loop is shown on the bottom left. November 12, 2010. Photo: Edmond Terakopian
The finger loops, which are metal and covered in leather (and come in two sizes) are slightly more usable. The very first time I held the camera (you insert two fingers through the loop), it felt strange but quickly became quite comfortable. With use, one acknowledges that it’s actually quite a neat system and very secure. I would probably opt for the included carrying strap though as I’m just used to having a camera on my shoulder. This new one sided mounting system does away with the traditional strap lugs at either side, again making for a very clean look.
Reality
I would love an M9 Titanium in black paint. I generally shy away from shiny cameras for my work. The less attention, the better considering some of the environments I work in. Titanium is wonderfully strong and light and is the perfect metal for these tools of ours. Alas, it’s expensive and harder to work with, needing special tooling. The M9 Titanium also has a special hard coating which is applied in Switzerland, so this camera, even if mass produced will never be cheap. Still, as a photographer, a black, or very dark and matt coloured Titanium Leica would be fabulous.

Test images shot with a Leica M9 Titanium. Photographer Brett from the Leica Akademie. November 12, 2010. Photo: Edmond Terakopian
The current M9 Titanium is a thing of beauty. Everything about it is pure elegance; not just elegance though as it’s combined with absolute usability and stunning design which marries the aesthetic with the practical. As someone who prefers black, I can look at this camera and I still appreciate it’s gorgeous looks and even the colour. How good does it feel? Just think about my earlier comment that it makes the regular M9 feel cheap.
For a set of picture taken with and of the Leica M9 Titanium, please visit my Flickr page.
©Edmond Terakopian


")