Category Archives: Computers and Software

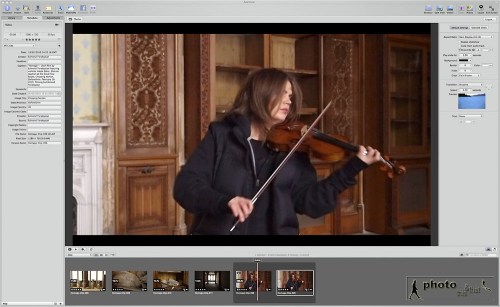
Aperture 3 Review

I was one of a few fortunate photographers who were invited to take part in Apple’s Aperture 3 beta program a couple of months before launch. As a result I’m in a unique position as being the longest user of Aperture 3 in the UK.

Up until Apple released Aperture in November 2005, photographers were using three programs to do their image editing. A browser like Photostation which was later over-taken in use by Photo Mechanic for editing and batch captioning, a RAW converter like C1 Pro and finally an image editor for final processing in the shape of Photoshop. Aperture changed all of that bringing editing, captioning and processing under one roof with the need for Photoshop on some images. By March 2008 and the adjustments plugin architecture of Aperture 2.1 products like Nik software’s Viveza made using Photoshop practically unnecessary.
The beauty of Aperture has always been that all the adjustments you do, and all the versions you create of the same image within Aperture, never take up any extra space as these are just instructions which are applied once the image is exported for use. This is not true if one needs to export into Photoshop or a plugin such as Nik’s Viveza; in these circumstances a second version of the image is created and the change applied to this second version is permanent and cannot be undone once applied.

Aperture 3 as an image editor, raw converter and processor

Perhaps the biggest and most genius change to Aperture is the addition of non-destructive brushes which allow the photographer to dodge and burn, polarise and smooth to their heart’s content, straight “onto” the RAW image. The beauty of this is that any of the multitude of brushes is non-destructive and just stores the instruction for the change as opposed to modifying the original image file. What’s more is that almost all of the adjustments can be applied by using these non-destructive brushes. This new technology now means that having to create new versions of the image by exporting to Photoshop or a plugin is no longer necessary, as most things can now be done in Aperture’s non-destructive environment. If this wasn’t enough, these brushes also have edge detection which stops the action being performed from bleeding over.

For me, the next most impressive and helpful thing is the way that importing images has been changed. The way it works is by downloading all the jpeg previews from your RAW files. These pop up almost instantly as you plug in your card. This allows the photographer to begin editing images, captioning and even adding adjustments whilst the images are still downloading! Whilst the previews download and we edit, the RAWs are then downloaded. It’s absolutely astonishing to see. Another very neat addition to the importing feature is letting the program split images into different Projects automatically based on time or date differences. To add to this one can have a preset, either user generated or one of the program’s own, added to the files as they import.

These presets are extremely useful and range from correction type presets to creative ones like cross-processing and toy camera. Naturally these can be applied freely.

My preferred way of editing, after I’ve done my rough first edit, is to place the cursor on the part of the image which has to be critically sharp. I would then hit the ‘Z’ key to zoom into 100%. The helpful addition to Aperture 3 is that if now I hit a cursor key to edit through my images, all the zoomed in actions will be done to the same point. This saves an enormous amount of time and added to the blisteringly fast importing means that an edit is done in no time.

The zoom feature has been further improved by allowing zooming in further than 100% which is very helpful when retouching very fine detail. This was one of the reasons why I had a need for Photoshop – no matter how fine the dust particle might be, I can now handle it in Aperture, saving time and disk space.

For users with smaller screens like the 13” MacBooks Pros, working in full screen now allows access to all the controls one would get in the normal view.

Faces has to be seen to be believed; with an enormously high accuracy rate this feature trolls through the hard drive picking up almost every single face. Not only obvious ones such as in a portrait, but faces in the background in crowds and so on. Once the user begins to tag these faces, the program gets more accurate at spotting them and tagging them. On exporting an image, these names are written to the Keywords in the metadata. Naturally inside Aperture they can be used to locate people. On large libraries this is an intensive process the first time you do it so I’d advise setting aside some time and allowing your machine to run overnight.

Places is also extremely useful for attaching GPS tags to your images. These can come from your camera if it has this function, from an iPhone 3G if you were to take a shot at the same location or it can be manually done using map views inside the application.

Although a “Levels” man myself, I know some of my colleagues prefer to work in “Curves” which is also now supported.

Lastly, for photographers who take advantage of social networking, FaceBook and Flickr integration are now built in.

Not All Smooth Sailing

Before the release of the 3.0.1 update recently, there were reports from users on the web experiencing issues. Some of the issues with version 3.0 were problems with upgrading libraries from version 2 and the other was a memory leak experienced by users with very heavy retouching. Out of three machines, two of mine upgraded smoothly but the third machine with a library of over 380,000 referenced images and over 44,000 managed files did experience issues with the upgrade. After I repaired permissions and rebuilt the Library in Aperture 2 and with the release of Aperture 3.0.1, the upgrade went smoothly, taking around four days to complete. Some user intervention before upgrading is a must. I do recommend you read my extensive tips on upgrading on my blog http://www.photothisandthat.co.uk/ The 3.0.1 update has also fixed the memory hole.

Aperture 3 as a video editing program

The ‘M’ Word

Yes indeed, the word is multimedia. We’ve all been thrown into the deep end of audio and video along with our photography. Good news is that Aperture 3 can now handle all of this and has become the hub of all my multimedia work. You can download all your video and audio files into Aperture 3. Video, including HD, can even be trimmed for basic editing and exported into a video editing program like iMovie or Final Cut Pro, or exported out for use in various forms. The same is true for audio files. Great news is that for backing up, you can export the project, consolidating the master files and use these as your backup.

For my short film Homage, I chose all the best clips by star ratings in Aperture 3 and used the caption field to make necessary notes. When in Final Cut Pro, these notes made it very easy to edit.

It’s also now extremely easy to put together audio slideshows, blending photos, multi-layered audio and text together and allowing effects like “Ken Burns”. The slideshow can then be exported as a QuickTime movie and uploaded to the web.

Conclusion

Aperture 3 has over 200 new features and I’ve run out of space. Having used the program for real day to day work for several months I can’t express how enthusiastic I am about this application. For today’s multimedia photographer it’s an absolute must. It takes a little bit of care when upgrading, but apart from that I cannot fault Aperture 3. It ticks all the boxes.

This article originally appeared in the BJP in April 2010.

Update

A lot has changed since I originally wrote this article. At the time of this update, Aperture is up to version 3.0.3 and is solid and speedy. There have been more improvement done to the batch metadata system and neat touches like a centre line showing in the straighten tool which allows for  getting horizons straight very easily.

I have not only been using it as my image processing and multimedia hub, but also to create audio visual slideshows and even to give presentations from. I was very impressed with and embraced Aperture before, but with version 3, it would be safe to say that I love it (as much as a man could love software!).

Nik Software Webinar

I love doing workshops; having the joy to pass on some of my knowledge and help colleagues out. As regular readers of my blog will know, I’m a huge fan of Apple’s Aperture and along with Nik Software’s Viveza (and now Viveza 2), my workflow has drastically improved as far as speed and quality is concerned.

When Nik software approached me to do a webinar, I jumped at the opportunity to talk about my favourite plugins. Not only is this a chance to reach out to colleagues in a workshop sense, through the magic of the internet, our session can be accessed by many more people.

I’ll be talking about how some on Nik Software’s plugins (namely Viveza 2, Silver Efex Pro and Sharpner Pro 3) fit into my day to day workflow.

I hope that you’ll be able to join me for this free webinar:

25 May 2010 at 7pm GMT or 8pm CET

Please go HERE to register for the event.

Hope to see you there 🙂

Addendum

Click here to see the recording of the webinar.

Printer Profiles With The ColorMunki


It’s always very exciting when evaluating a new product. Being one of the first on the planet to try something out that’s going to enhance one’s future workflow or a new tool which will add benefits is great. It goes without saying that this is how it felt when Canon asked me to evaluate their new 12 ink large format printer aimed at photographers; the iPF6300.

However, it’s not all excitement and fun as there is a surprising amount of hard and laborious work involved. One of the things I was asked to evaluate was how the printer behaved with various papers; both Canon and third party. This entails having to make hundreds of prints, in colour and black and white, using a variety of images and also a variety of print settings on all these different papers.
One hurdle I soon came across was that as this printer was so new and hadn’t even had it’s European launch, I was missing a large number of paper ICC profiles. These profiles, along with the correct media setting tell the printer how to print (how much ink, how to print the correct colour, which black ink to use and a host of other ‘under the hood’ settings which are chosen automatically) once the ICC and media settings are applied in the printer driver or plug-in. These ICC profiles simply didn’t exist. Canon had supplied me with most of the profiles for their wide range of papers but Hahnemuhle and Ilford didn’t yet have profiles and were working on getting them to me for some of their papers. I also had other papers from other manufacturers like Olmec too.
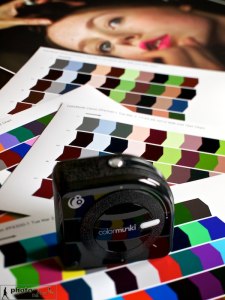
At this point I asked to borrow a ColorMunki photo from Canon’s Gary Vaughan who had kindly trained me on the printer. Apart from being used for screen calibrations, the ColorMunki from X-Rite can also be used to create ICC profiles for printing.
I loaded up the software, read the concise instructions and was good to go. Although my screen was already calibrated using my Eye One Display 2 and Color Eyes software (with which I’ve always been happy) I decided to calibrate my screen with the ColorMunki too. One very neat feature is that it can measure the room’s ambient light and take this into consideration when calibrating the screen’s luminosity.
After the screen was done I proceeded to getting my paper’s profile done, and chose Canon’s Glacier paper as my first port of call. I had already made some prints with this paper using a profile of a very similar paper but the results just didn’t sing. One extremely important thing to remember when making paper profiles is to make sure that colour management is switched off in the printer driver. The software guides the user through and I must say that I’m very impressed by the way it makes it child’s play to use. After a few steps, it prints out a colour chart which one then ‘reads’ with the ColorMunki puck. All you need to do is basically run the unit over the coloured bars, one column at a time. It then creates a second print out with a different set of colours and the same step is repeated, allowing the software to create an extremely accurate ICC for that paper. So easy and very smooth.
I chose my newly created printer profile and made another print – this time the print sang. I must say, I’m so impressed with this unit. It’s so straightforward to use with extremely user friendly software and is such a capable unit calibrating my screen and printer paper that I’m in absolute awe. I cannot recommend this highly enough.

Tips On Upgrading To Aperture 3

The biggest part of upgrading from Aperture 2 to Aperture 3 is that your library will need to be upgraded. The library file can hold many thousands of images (mine has around 350,000 referenced files) and all the data needed for showing edits, adjustments and metadata. All of this data, which is pretty complex, needs to go through the upgrade to use the superb new features in Aperture 3.


You can take a couple of steps to ensure a smooth upgrade. First and foremost, make sure you have a good and current backup of your work; regular readers, colleagues and friends will know my feelings on having a good backup regime. Secondly, this is not a rush job. If you have a very large library, this can take a couple of days, so try and time it for a weekend.

Whilst still in Aperture 2, start up the application holding down the ‘alt’ and ‘cmd’ keys. This allows you to then choose to rebuild your library. This will fix any issues your library has and in my opinion is a must for anyone upgrading, especially if they have an old library.

Once this is done, you can install Aperture 3. However, don’t start it just yet! I would recommend you start it by holding down the ‘alt’ key. This will let you start with a new library. Once you have done this, go into the preferences and for the time being, switch of Faces; this is the useful facial recognition facility. If you have a large library, this feature can take many hours, sometimes overnight, to go through all the many tens of thousands of faces; so switch it off for now.

Now quit Aperture and start it up again. Then run Software Update and install any updates available. After you have started up again, choose to quit. Lastly, start up again whilst holding down the ‘alt’ key and choose your library from Aperture 2. This will now begin the upgrade process. Depending on how many images you have, this could take a while. My archive goes back a couple of decades and as it’s rather large took almost four days to upgrade.

Once your upgrade has happened, the images are upgraded within the program. You can check on it’s activity by looking in Window / Show Activity. Once this is done, I suggest you quit the program, maybe even restart your Mac. Launch Aperture 3 and begin to explore. Now’s the time to switch on Faces again. As I mentioned though, this is pretty computer intensive the first time you run it, as its cataloguing a huge number of faces; I’d recommend you leave it to do it’s thing and only use the computer once it’s finished.

My last piece of advice would be to upgrade to 4Gb of RAM. Aperture 3 is not only the best imaging program in my opinion, it also becomes your multimedia hub, allowing not only storage and cataloguing of clips, but also basic editing of video and audio. More RAM will mean a smoother and more enjoyable experience.

As mentioned before, for this upgrade, it’s best to just leave the computer running overnight and over the weekend to allow it to work without distraction. The new library of Aperture 3 is faster and has a huge number of excellent features like the non-destructive brushes, so it’s well worth showing some patience. You’re going to love it!

Addendum: Thanks to Carlo with his comment below which reminds me:

1- Aperture will need twice the space of your current Library for it’s upgrade; the reason for this is simply that in case your upgrade fails, you still have your original Library file intact. It’s a great safety feature.
2- As drives get fragmented over time, to have the absolute smoothest upgrade, get a new drive (internal SATA or external FW800 ideally) and format this. Then drag over you Library file. This allows it to to copy across and keeps all the data continuously and not in a fragmented way.

Aperture 3 – Quick Performance Tips

No doubt most Mac users have been trying out Aperture 3.0. On Twitter and some forums, there has been the occasional users who have upgraded to version 3 reporting slower performance to what they expected. The majority of what I’ve read though is reporting faster performance, which is something I totally agree with.


I have two tips to help out those who may be experiencing slow systems; before that though, you should ideally upgrade to 4Gb of RAM. Being a 64-bit program it can manage extra RAM extremely well, so the more loaded your system, the more obvious speed gains you will see.

Tip 1: In Preferences go to the Previews tab and only tick “Use embedded jpeg from camera when possible” and if you don’t need it, choose to ‘Never’ share previews with iLife and iWork.

Tip 2: Aperture 3.0 now has the Faces feature. It has to be seen to be believed; it still amazes me how it can pick out faces throughout my Library and start to recognise people after they have been tagged a few times. Whilst this feature will be of great use to some, you need to realise that it’s a very computer intensive process the first time it runs after an upgrade, or if you are using a trial and have imported many thousands of images. My suggestion would be to switch off the feature when you’re using the program and then switch it on to run over night. Once it has catalogued the many thousands of faces, you won’t notice a performance hit.

During my beta testing period, I used a 15″ MacBook Pro with 2.53GHz Intel Core 2 Duo and 4Gb of RAM. It’s definitely not the fastest in Apple’s line-up but by following the above suggestions, runs extremely fast with Aperture 3.0.

Lastly, check out Mac Create for some great information on Aperture 3.0.

Storage For Photographers

Your Hard Drive Will Fail;

It’s Just A Question Of When


A yawn is the typical reaction from my colleagues when the topic of digital storage, archiving and backing up is talked about. That is, until one of them loses their work, because they weren’t paying attention to the need for a reliable back-up strategy. The yawns are then replaced by much shouting of obscenities and tears.

In this day and age of digital photography, the obsession of ever increasing megapixels, the need to shoot video and record audio, one thing is for certain; we need somewhere to store it all. The lazy and stupid will leave it all on their laptop until the disk’s full and then drag it off in a hurry, onto an external drive, usually losing stuff. Sometimes they’ll even be stuck on a job with no choice but to delete older stuff just so they can download the latest job and process it. I’ve even seen colleagues work straight of a CF card when in a hurry send a low res jpeg, forget to download the card and then format it. Disaster.

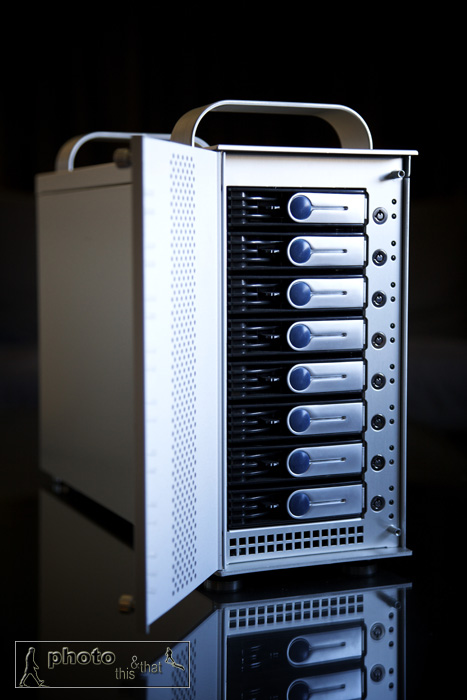
Sonnet Tech Fusion D800 RAID Sata 8 drive external box. Photo: Edmond Terakopian

Although it’s a pain, at the end of a long day, it still pays to have a system. My personal way is to never format my CF cards until I have the same work on at least two hard drives. If it’s just on my MacBook Pro, then the CFs remain in my belt pouch until this has been backed up at home. I have a ThinkTank Photo Pixel Pocket Rocket which is always full of CF cards. I make it a point to have more than enough cards with me. I always have one small external hard drive with me too, so I might back up onto this. When on foreign assignments, I carry two external drives and back up onto these (these portable drives are never stored with my laptop. I’ll leave one in my luggage and have the other with me if leaving the laptop in a hotel or car). Once home, after a typical day in town or a trip, I’ll back up the assignment onto my Mac Pro’s Aperture Library.

I’m a big fan of Aperture and have it on all my machines. Apart from RAW processing, Aperture also acts as a fully searchable image database. At the moment I have more than 385,000 images in my Aperture library, and this number is constantly growing. RAW images are stored on an internal drive, in separate Project folders which are derived from the assignment. These are titled using a date and a name. An example would be “2009-09-28 Gordon Brown”. These Projects (with consolidated masters) are then backed up onto a Sonnet Technologies external SATA RAID box (more on which later). The same Project is also backed up onto an external hard drive which is kept off-site. It’s important to have off-site storage to secure the safety of data in the event of fire or theft. Lastly, important images, documents, video and audio are backed up to “The Cloud” (more on which later).

What’s New?

The old ways to back up were CDs and then DVDs. Blu-Ray doesn’t seem to have caught on, even though a double sided disc offers 50Gb of storage. The problem with optical storage, apart from the slow speed of writing, is that they don’t seem to have the longevity needed. I’ve had top brand CDs, kept upright in their cases and stored in cool, dark and dry conditions become unreadable after a few years. There is a 500Gb optical disc that’s being talked about, but again, how long is any media stored on that going to last? I for one certainly hope that it has proper archival stability, as it really would be useful to have.

My thoughts are that using several hard drives which are swapped out every three to four years, is the best method available. This provides speed and security. It also offers value for money, as drive prices continue to fall, with speed and capacities rising.                 

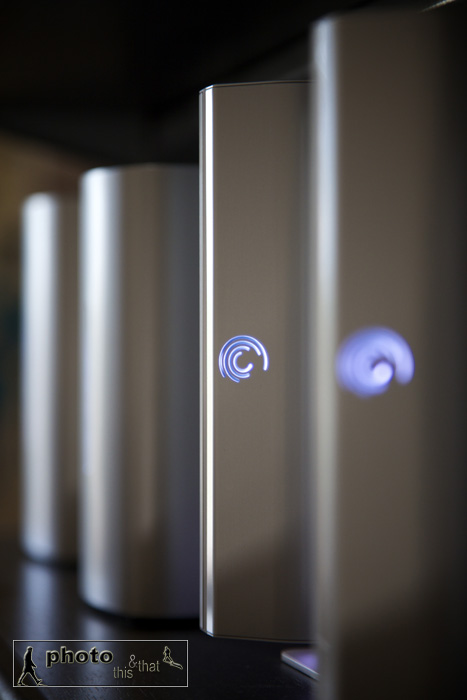
External Seagate hard drives, with Western Digital drives in background. Photo: Edmond Terakopian

If you’re wondering why I seem to have an obsession with several hard drives, and a golden rule that everything is kept on three drives at least, it’s because hard drives fail. It’s an absolute given. Anyone in IT will tell you that hard drives fail, it’s just a question of when. I’ve personally had a major brand name drive fail after 3 months of use whilst sat on a desk, but had others which have worked solidly for many years. It’s always a gamble, and you should be well prepared.

At the moment, I have 12 external drives in my office and all the associated cabling and power bricks cluttering up the floor area. After some research, I recently decided to go for a Sonnet D800 Fusion RAID ( www.sonnettech.com ). This is an external SATA RAID box with eight drive bays. This means that it will hold eight hard drives, connect to my MacPro (its multi platform) using eSATA cables (connecting to its own controller card which installs inside your computer) which means that it’s blisteringly fast, and has only three cables; two eSATA cables and one power cable. To say that it’s a neat and tidy solution would be an understatement. I’ve recently finished moving my archive over to this system and will do away with most of the external drives. This also makes the office more quite and power-efficient.

I have the drives in the D800 set up in pairs of RAID 1 (also known as Mirror RAID). This basically means that everything that is saved on the drive (and you will only see one of the drives on your computer), is automatically copied onto its partnered drive. This is transparent, automatic and at the same speed. This protects the data from a hardware failure. I then manually back up data from this unit onto an external drive via FW800. This ensures that if by accident I erase an image, or an image gets corrupted, I can get it back from this back-up. These back-up drives are then stored off-site.

In use the system is amazing. Accessing images or video on the unit is blisteringly fast as it’s working over SATA, which is much quicker than even FW800. I’ve had the unit running for weeks without powering down and it’s been absolutely stable on the Mac Pro running Leopard.

The other new term you may have heard is “The Cloud”. This is virtual storage that’s kept on servers, somewhere in the internet, sometimes even in different countries. The Cloud’s not such a new thing, but with faster broadband, it’s now becoming more usable. Apple has had “.Mac” (now called “Mobile Me” www.me.com ) for years. Part of this service has been the iDisk which has been a virtual drive, available for use by Mac and PC users. I’ve been using this system for many years, and although a little slow, it’s been solid and stable.

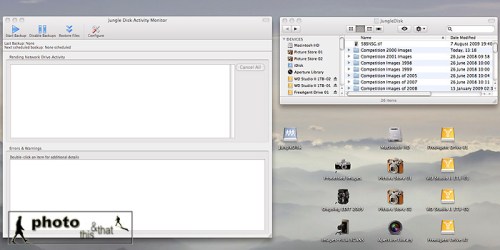
The other Cloud system I’ve been using for around a year is Amazon’s S3 via Jungle Disk ( www.jungledisk.com ). This mounts a virtual drive onto your desktop (it’s multi platform) and allows you to use it like any other drive. It’s a faster system than iDisk and allows you to pay for the storage you use. At the time of writing, this is $0.15 per Gb per month. Your data is then saved on Amazon’s servers either in the USA or in Europe at locations which are not disclosed.

I’ve been using the Cloud in two ways. When on assignment, if I’ve shot a particularly important image, I’ve been saving them immediately to my iDisk. This has been for back-up purposes. Also, if I’ve got documents to which I need access, as well as having copies with me, I’ve also got them on my iDisk. This also includes email and FTP account details, which means if my laptop gets stolen, I can still function by accessing this information from another machine.                                                                                              

Screenshot from an Apple Mac running OS X showing Jungle Disk which is used for accessing Amazon S3’s Cloud service.

As my working year continues, every few weeks, I upload the edited pictures from assignments to my Amazon S3 drive. At the end of the year, like most photographers, I look through that year’s work and select my best work for competitions. Once I have this edit sorted, and the images processed to perfection, I take the contents of this folder and also upload it to Amazon S3. This gives me an off-site back-up of the year’s de facto most important and best work.

Lastly, a word on automated back-ups. I use Apple’s Time Machine to back up everything apart from my work images. This includes emails, invoices, letters, music, family snaps and so on. It’s saved me twice so far after I accidentally deleted important information. You can get back-up software for any platform, and I urge you to also have this system in place. For me, I use a separate FW800 drive for this purpose.

One thing’s for sure; as prices tumble for memory cards and hard drives, there’s no excuse not to have a solid and dependable back-up strategy. A little time spent planning and executing this strategy will save much stress and tears; trust me, I’ve seen enough colleagues suffer.

This article was originally published in the BJP on October 07, 2009.